> ## Documentation Index
> Fetch the complete documentation index at: https://statsig-4b2ff144-serverless-cloudflare.mintlify.site/llms.txt
> Use this file to discover all available pages before exploring further.
# Okta SCIM Org Roles
## Update Okta User Org Role
For every user, Statsig surfaces a SCIM field named `statsigOrgRole`. Through this field, you can manage organization user roles.
Currently, Okta can only push role updates to Statsig.
### Step 1. Create the Custom Attribute in Okta
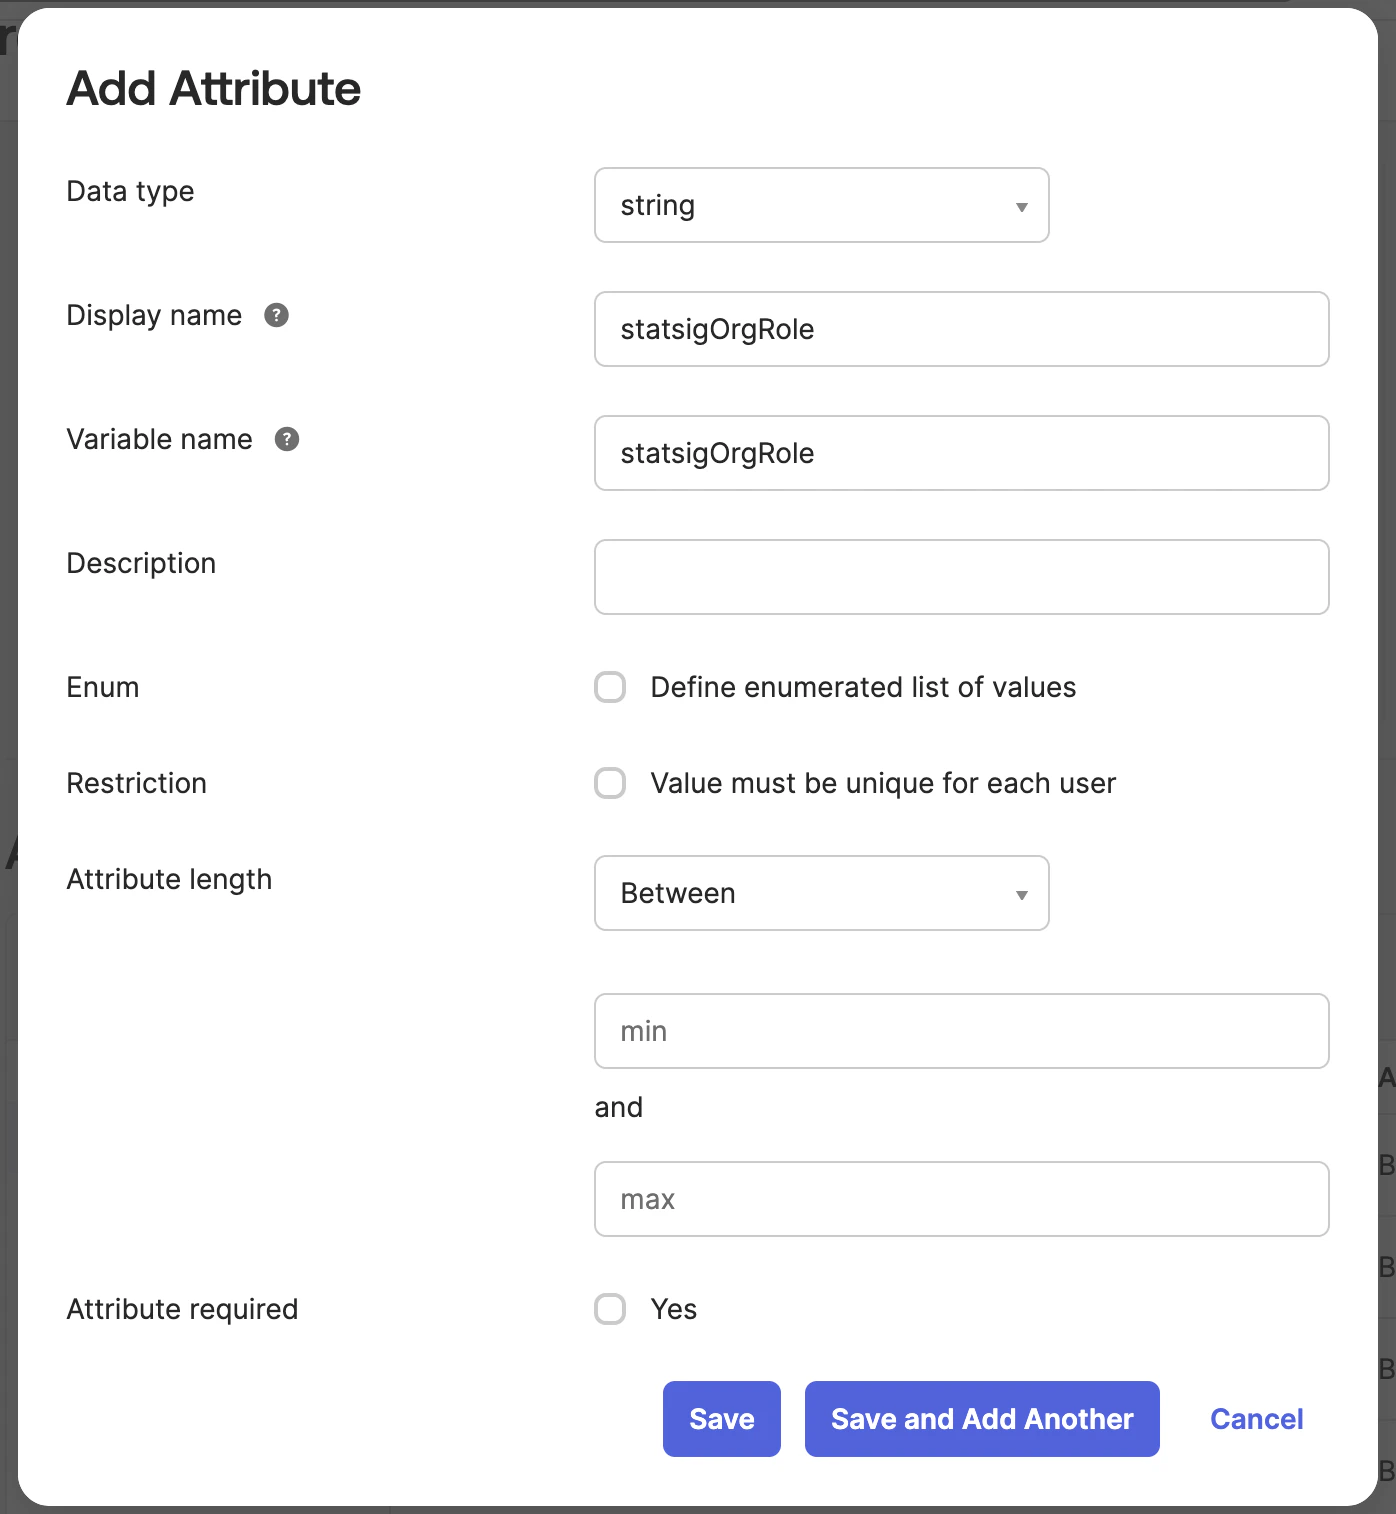
Navigate to `Directory > Profile Editor` and select the User (default) Okta profile. This represents all of the Okta users' attributes.
Scroll down and press `Add Attribute` and fill out the new attribute to have the variable name `statsigOrgRole`.
 ### Step 2. Create the Custom Attribute in the Statsig SCIM Integration
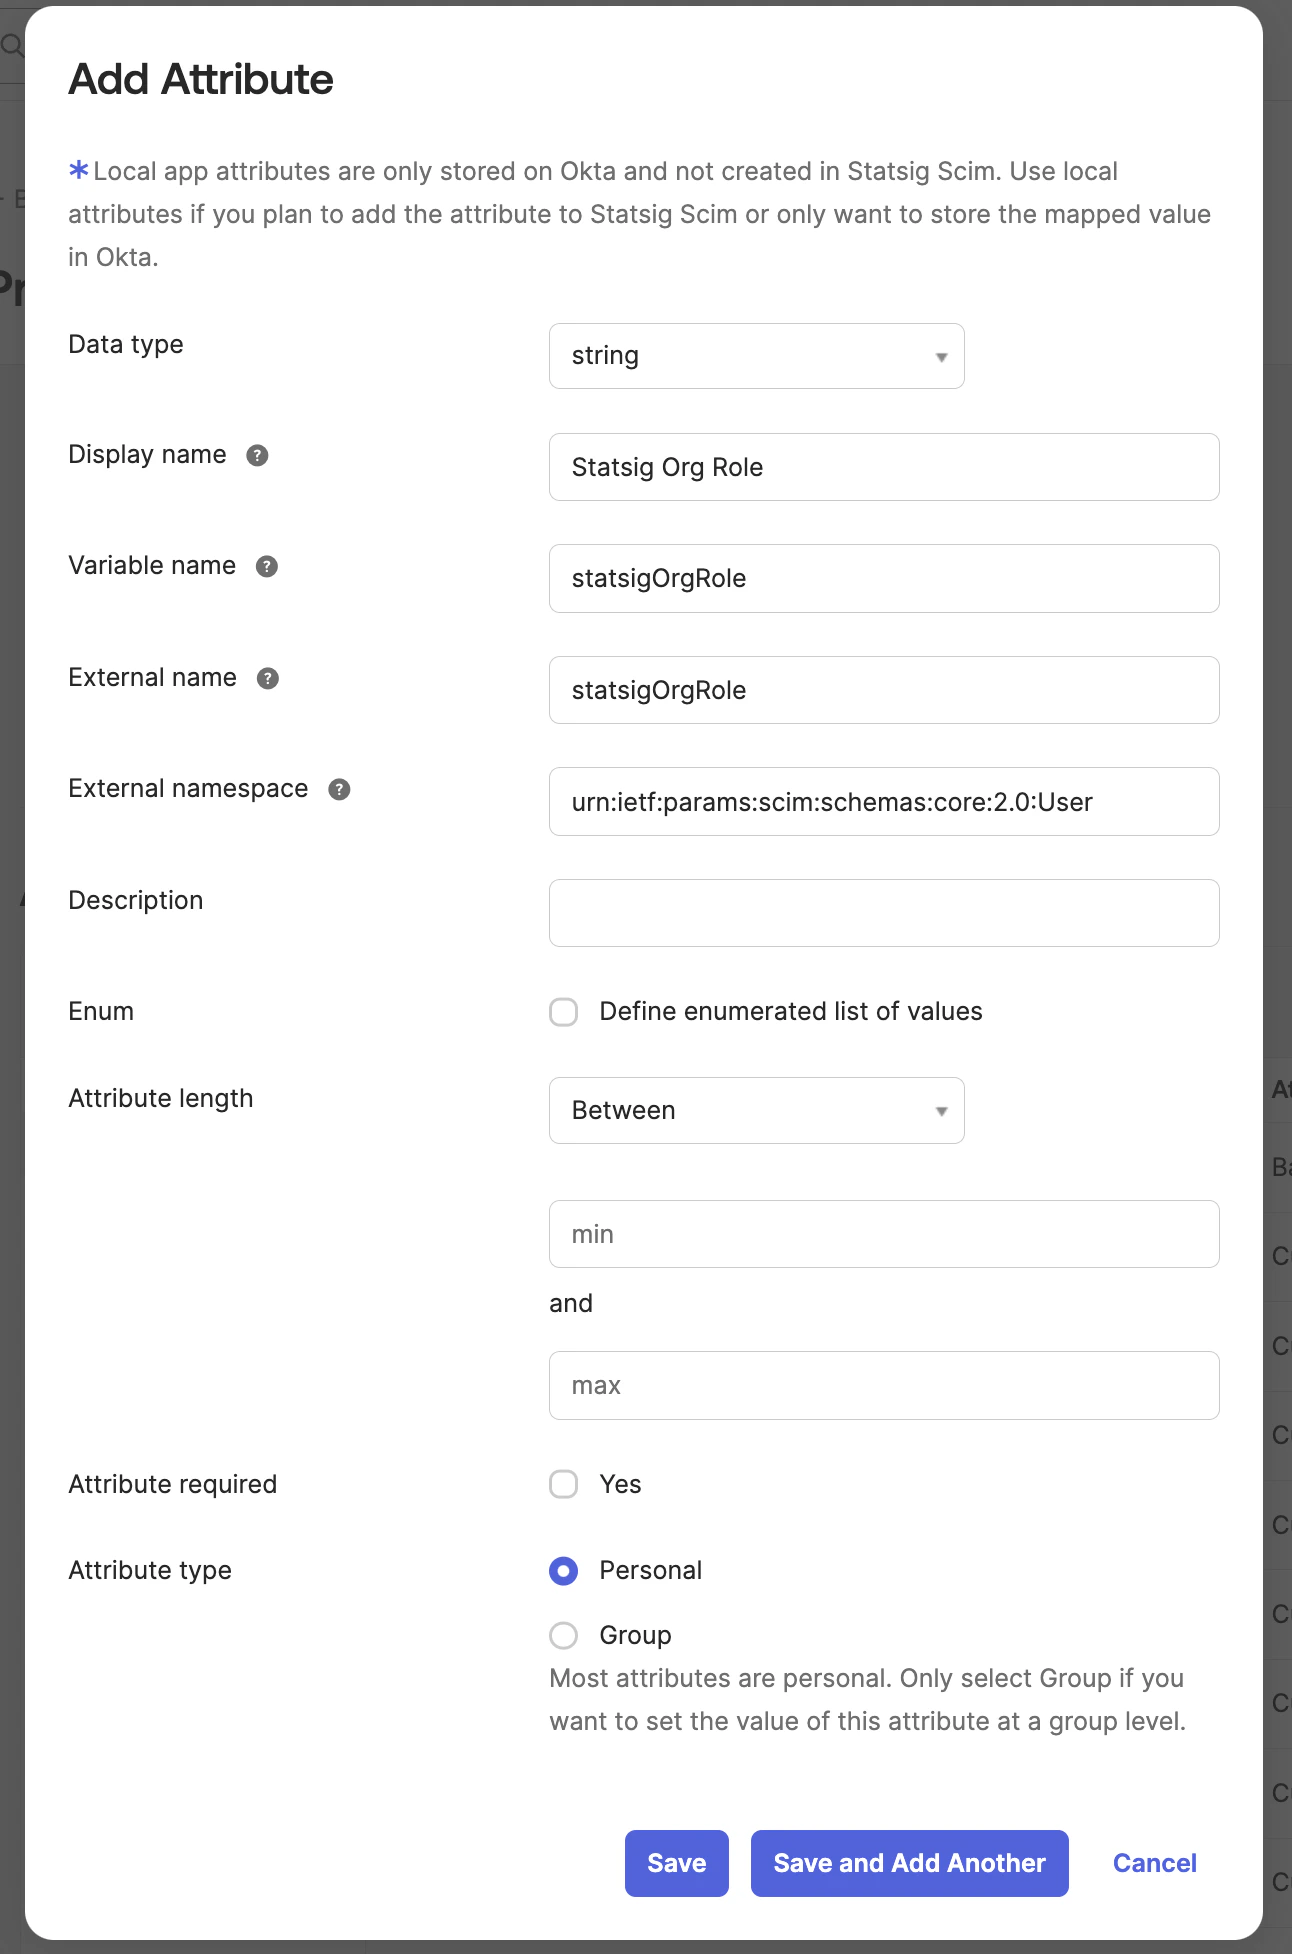
Now Navigate to the `Statsig SCIM Integration's User Profile` in the `Profile Editor`.
Add an new attribute that matches the following format:
* Variable name: `statsigOrgRole`
* External namespace: `urn:ietf:params:scim:schemas:core:2.0:User`
### Step 2. Create the Custom Attribute in the Statsig SCIM Integration
Now Navigate to the `Statsig SCIM Integration's User Profile` in the `Profile Editor`.
Add an new attribute that matches the following format:
* Variable name: `statsigOrgRole`
* External namespace: `urn:ietf:params:scim:schemas:core:2.0:User`
 ### Step 3. Create a Mapping from Statsig to Okta for the Custom Attribute
On the same Statsig SCIM profile editor, navigate to the `Mappings` button.
Scroll down to the new attribute `statsigOrgRole` and map `user.statsigOrgRole` to the Okta attribute `statsigOrgRole`.
### Step 3. Create a Mapping from Statsig to Okta for the Custom Attribute
On the same Statsig SCIM profile editor, navigate to the `Mappings` button.
Scroll down to the new attribute `statsigOrgRole` and map `user.statsigOrgRole` to the Okta attribute `statsigOrgRole`.
 ### Step 4. Create a mapping from Okta to Statsig for the Custom Attribute
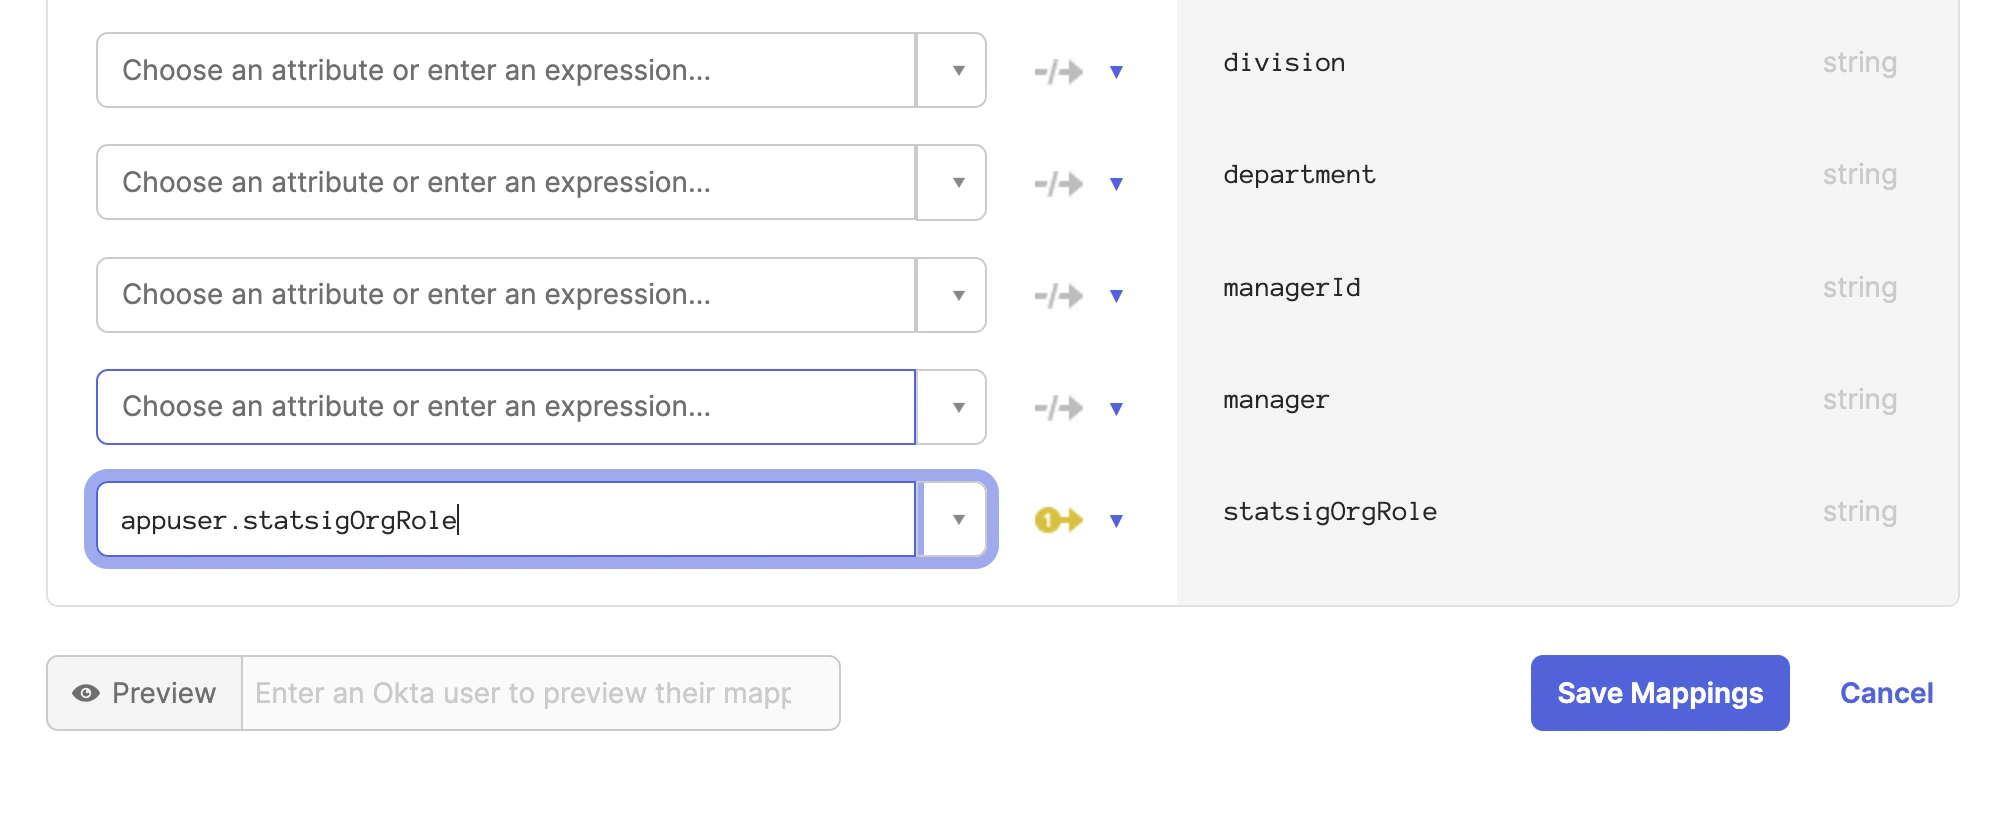
Now navigate to the Okta User to Statsig SCIM user mapping.
### Step 4. Create a mapping from Okta to Statsig for the Custom Attribute
Now navigate to the Okta User to Statsig SCIM user mapping.
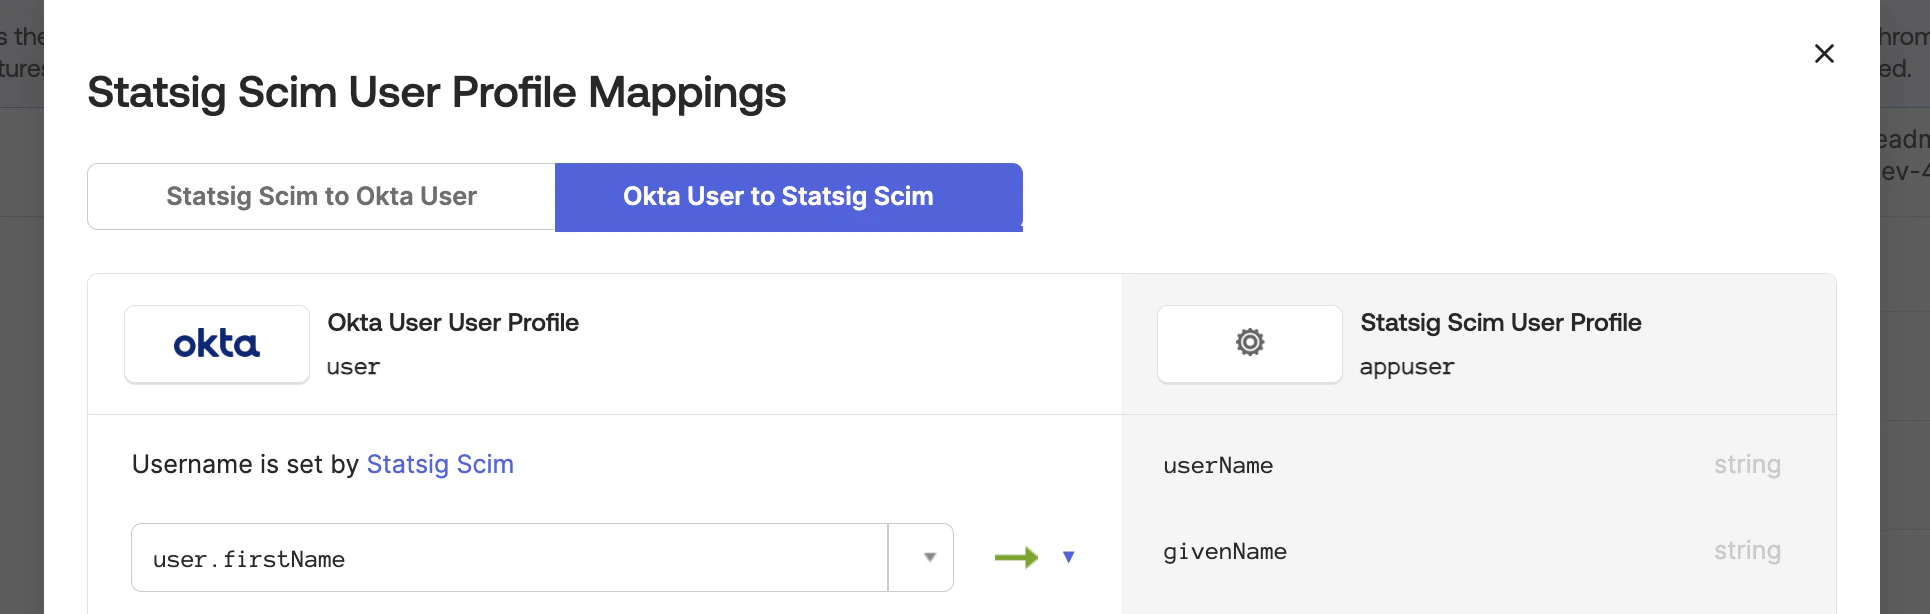 Scroll down to the `statsigOrgRole` attribute and map `user.statsigOrgRole` to the Okta attribute `statsigOrgRole`.
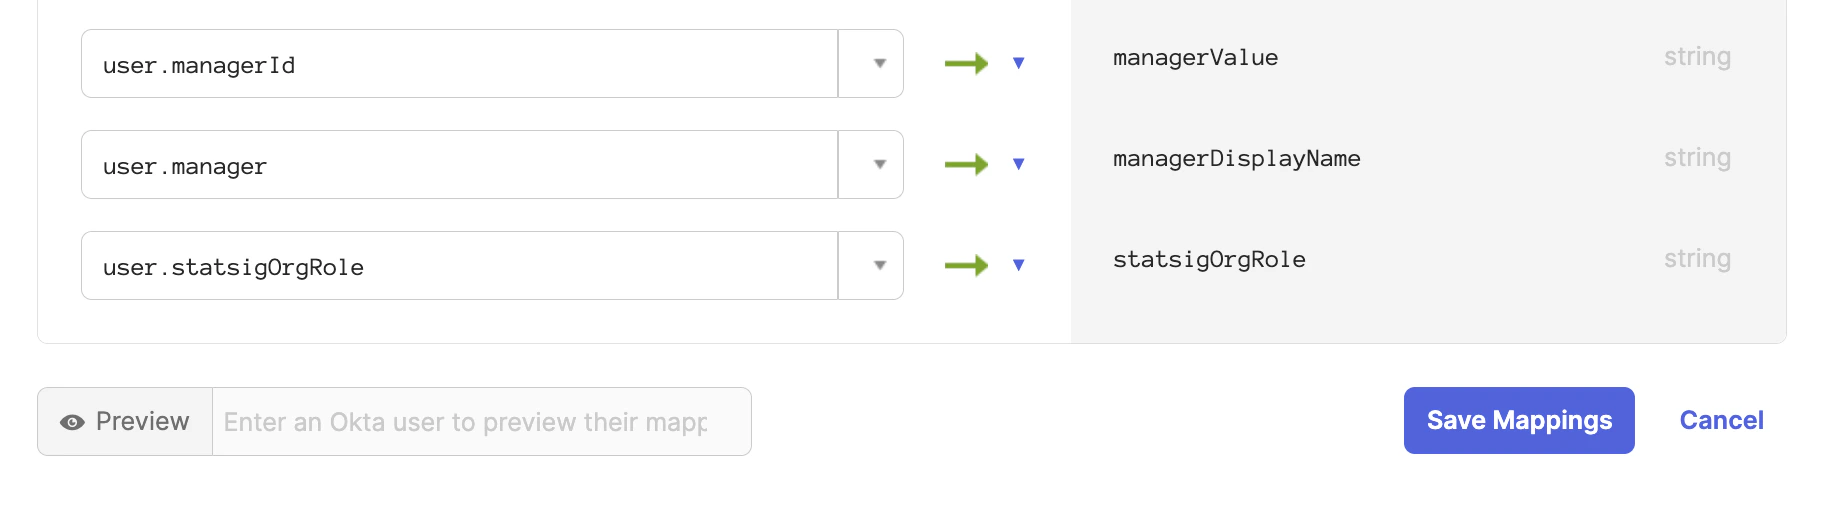 Now all users will be synced with their organization role. On the Statsig SCIM integration you can modify a user's role directly as well.
### Step 5. Modify Integration Mappings
Navigate to the Statsig SCIM integration provisioning section.
Under the "To App" tab, scroll down to the `statsigOrgRole` attribute.
Now all users will be synced with their organization role. On the Statsig SCIM integration you can modify a user's role directly as well.
### Step 5. Modify Integration Mappings
Navigate to the Statsig SCIM integration provisioning section.
Under the "To App" tab, scroll down to the `statsigOrgRole` attribute.
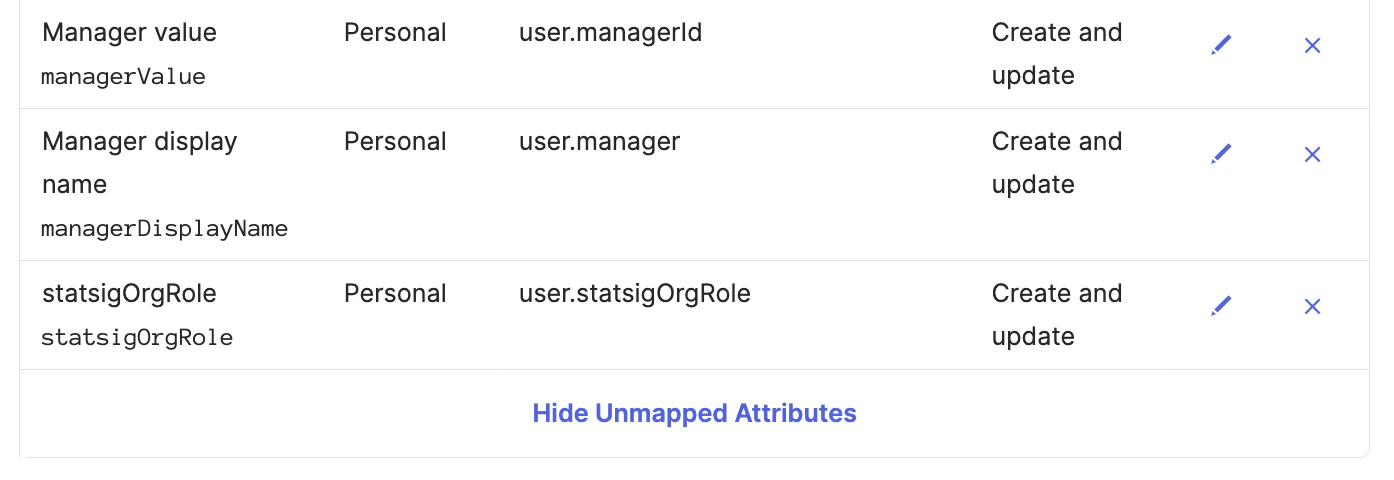 Set the attribute value to `Map from Okta Profile` and `statsigOrgRole`.
Set apply on `Create and update`.
Set the attribute value to `Map from Okta Profile` and `statsigOrgRole`.
Set apply on `Create and update`.
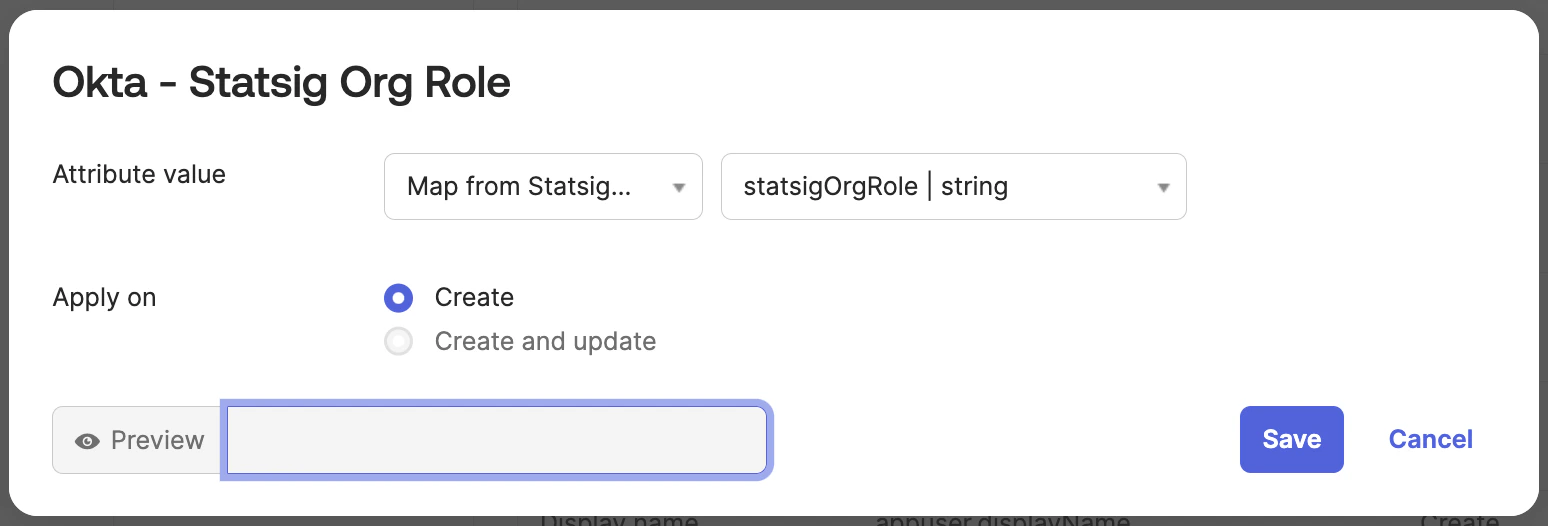
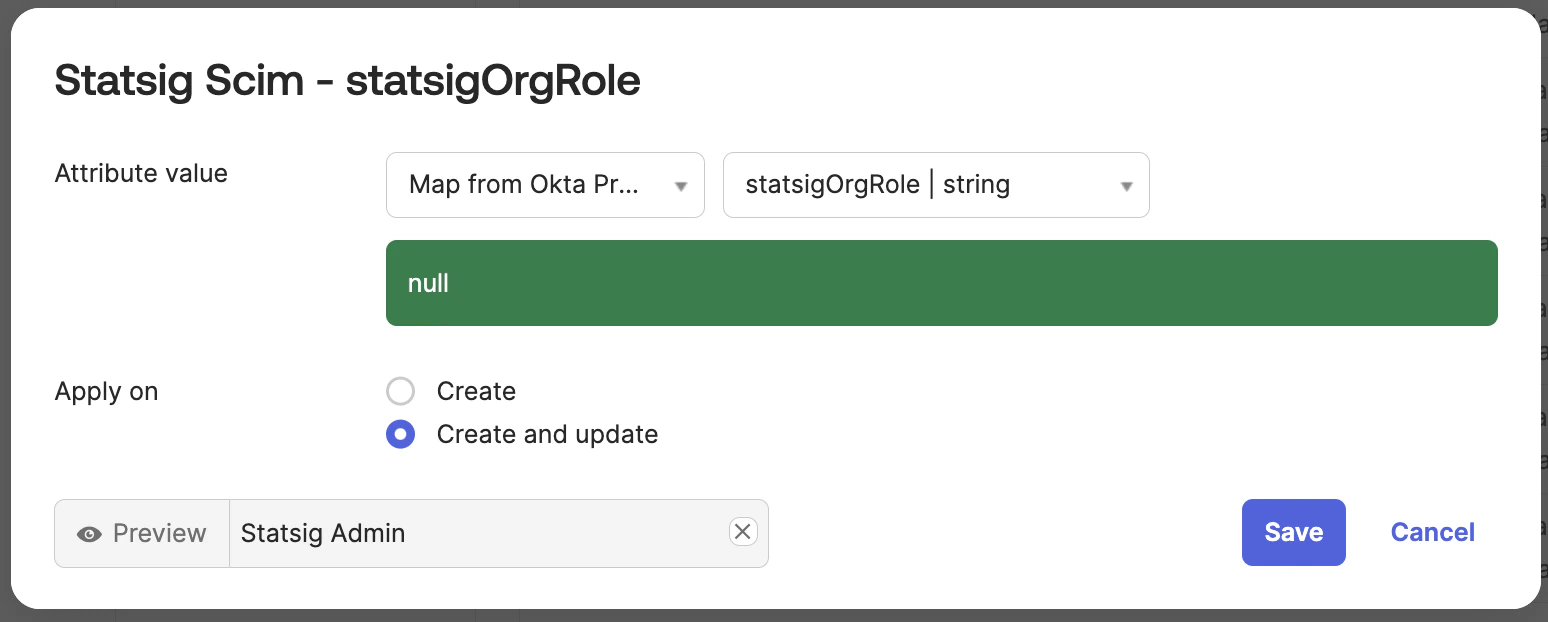 Navigate to the "To Okta" tab and scroll down to the `statsigOrgRole` attribute.
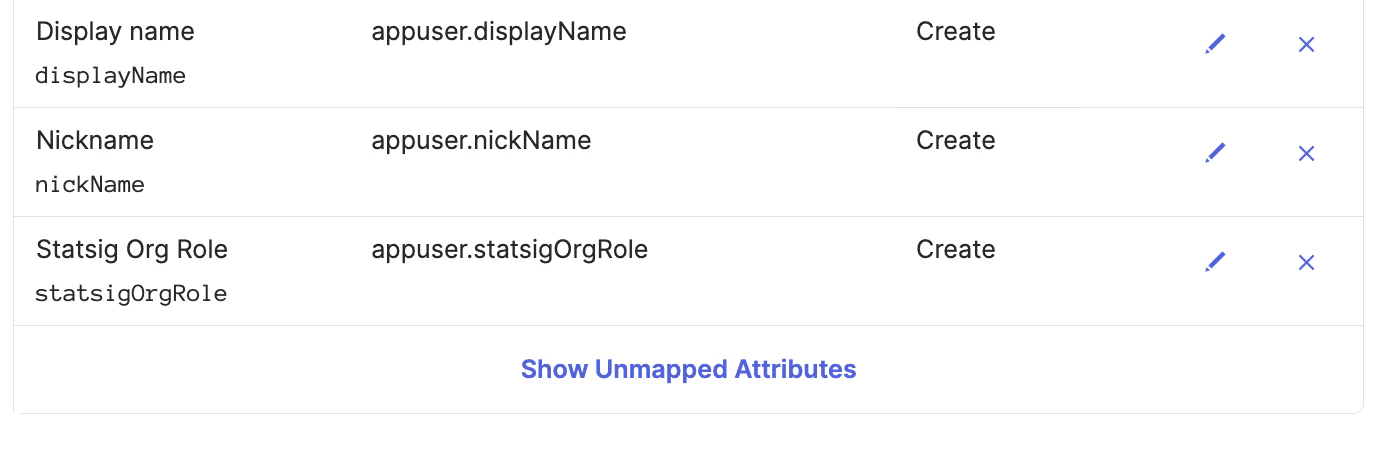 Set the attribute value to `Map from Statsig Profile` and `statsigOrgRole`.
Set apply on `Create`.
Set the attribute value to `Map from Statsig Profile` and `statsigOrgRole`.
Set apply on `Create`.