> ## Documentation Index
> Fetch the complete documentation index at: https://statsig-4b2ff144-serverless-cloudflare.mintlify.site/llms.txt
> Use this file to discover all available pages before exploring further.
# Build your first Device-level Experiment
When you cannot identify a user via their user ID, device-level experiments allow you to randomize experiments based on a consistent identifier for the user's device. While Statsig can automatically generate a stable ID, it's recommended to use your own cookie or logged-out ID when possible.
Device-level experiments are ideal in scenarios such as:
* **Anonymous or first-time users**: When users haven't signed in yet or are browsing anonymously.
* **Cross-device consistency**: Ensuring the same experience on the same device, regardless of user sign-in status.
You can implement a device-level experiment almost exactly like a traditional user-level experiment. The key difference is setting the experiment’s ID type. In this example, we set the `stableID` as the ID type, but if you have your own identifier you can substitute that as well.
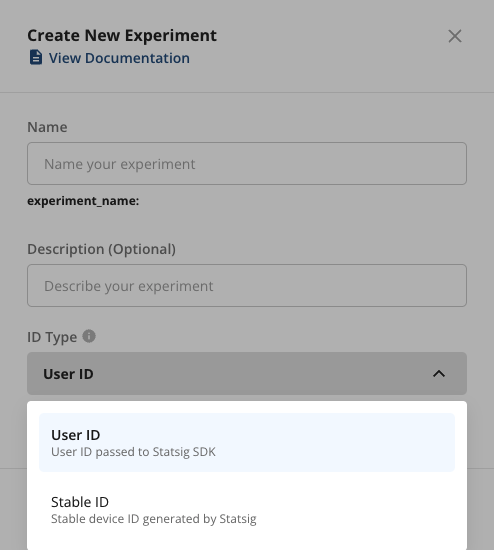
### Step 1: Create a Device-level Experiment
1. **Log into the Statsig Console**: Visit [Statsig Console](https://console.statsig.com/) and navigate to **Experiments+** on the left-hand sidebar.
2. **Create a New Experiment**:
* Click on **Create** and fill out the **name** and **description** of your experiment.
* Enable the **Use Stable ID** option during setup.
* Click **Create** to proceed.
 3. **Define Experiment Metrics**: Add a hypothesis, primary metrics, and secondary metrics in the **Scorecard** section, just like you would for a user-level experiment.
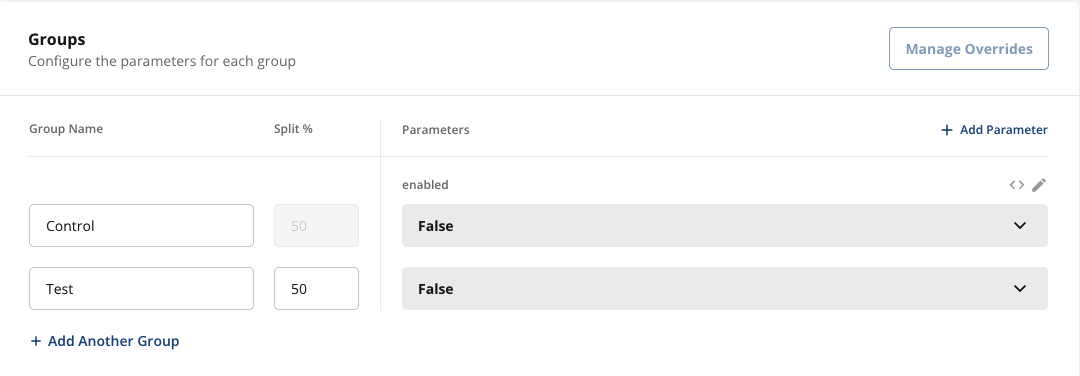
4. **Set Groups and Parameters**:
* In the **Groups** section, define the parameters for your experiment. For instance, you can experiment with a simple boolean parameter like `"enabled"`.
3. **Define Experiment Metrics**: Add a hypothesis, primary metrics, and secondary metrics in the **Scorecard** section, just like you would for a user-level experiment.
4. **Set Groups and Parameters**:
* In the **Groups** section, define the parameters for your experiment. For instance, you can experiment with a simple boolean parameter like `"enabled"`.
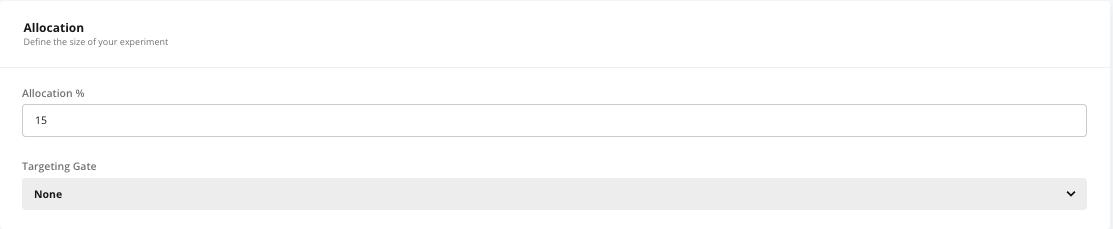
 5. **Set Allocation**:
* By default, the experiment targets 100% of your user base. Adjust the allocation if needed. Starting with a smaller rollout is often recommended until you're confident in the new variant.
5. **Set Allocation**:
* By default, the experiment targets 100% of your user base. Adjust the allocation if needed. Starting with a smaller rollout is often recommended until you're confident in the new variant.
 6. **Save and Start**: Once everything is configured, click **Save** to finalize your experiment. When you're ready to launch, click **Start** to roll it out.
### Step 2: Initialize the SDK in Your Application
After setting up your experiment in the Statsig console, the next step is to integrate it into your client application using one of Statsig’s SDKs.
**Important:**
* **`userID`** should **only** be set for authenticated, logged-in users.
* For logged-out or anonymous users, use **`stableID`** (Statsig’s auto-generated device ID) or your own custom deviceID to identify the device. See [customID types](/guides/experiment-on-custom-id-types) if you have your own deviceID
* Always pass all known IDs to the SDK — Statsig will use the correct one for evaluation depending on the experiment or gate’s ID type.
* If you do rely on stableID, it is only generated by Statsig client SDKs (javascript, react, mobile, etc) - server SDKs are unable to generate this ID for you
* **User attributes**: You can pass additional attributes like `appVersion`, and `custom` properties for experiment targeting.
#### Example (JavaScript):
```javascript theme={null}
const user = {
userID: userID: isLoggedIn() ? getLoggedInUserID() : undefined,
// Optional attributes to help with targeting
appVersion: "1.0.0",
custom: {
promoCode: "New30Off"
}
};
// Initialize the Statsig Client
const client = new StatsigClient(sdkKey, user, {
environment: { tier: "production" }
});
await client.initializeAsync();
```
> **Tip**: If your app collects other relevant attributes (e.g., device type, region), pass them in the `user` object to improve experiment precision.
### Step 3 (Optional): Update User Info for Logged-in Users
When a user signs in or creates an account, call the SDK’s updateUser method to attach userID and other logged-in attributes. This allows user-level experiments and gates to evaluate with the authenticated identifier.
#### Example (JavaScript):
```javascript theme={null}
const updatedUser = {
...user, // continue to send the deviceID!
userID: loggedInID,
email: signUpEmail
};
// Update the user object
await client.updateUserAsync(user);
```
> **Note**: Adding userID after login enables user-level experiments/gates to target and evaluate using userID. *Device-level* experiment evaluations remain based on stableID (or deviceID) and are not changed by adding userID, as long as you continue to pass that identifier as well! This preserves consistency of device-level bucketing.
***
6. **Save and Start**: Once everything is configured, click **Save** to finalize your experiment. When you're ready to launch, click **Start** to roll it out.
### Step 2: Initialize the SDK in Your Application
After setting up your experiment in the Statsig console, the next step is to integrate it into your client application using one of Statsig’s SDKs.
**Important:**
* **`userID`** should **only** be set for authenticated, logged-in users.
* For logged-out or anonymous users, use **`stableID`** (Statsig’s auto-generated device ID) or your own custom deviceID to identify the device. See [customID types](/guides/experiment-on-custom-id-types) if you have your own deviceID
* Always pass all known IDs to the SDK — Statsig will use the correct one for evaluation depending on the experiment or gate’s ID type.
* If you do rely on stableID, it is only generated by Statsig client SDKs (javascript, react, mobile, etc) - server SDKs are unable to generate this ID for you
* **User attributes**: You can pass additional attributes like `appVersion`, and `custom` properties for experiment targeting.
#### Example (JavaScript):
```javascript theme={null}
const user = {
userID: userID: isLoggedIn() ? getLoggedInUserID() : undefined,
// Optional attributes to help with targeting
appVersion: "1.0.0",
custom: {
promoCode: "New30Off"
}
};
// Initialize the Statsig Client
const client = new StatsigClient(sdkKey, user, {
environment: { tier: "production" }
});
await client.initializeAsync();
```
> **Tip**: If your app collects other relevant attributes (e.g., device type, region), pass them in the `user` object to improve experiment precision.
### Step 3 (Optional): Update User Info for Logged-in Users
When a user signs in or creates an account, call the SDK’s updateUser method to attach userID and other logged-in attributes. This allows user-level experiments and gates to evaluate with the authenticated identifier.
#### Example (JavaScript):
```javascript theme={null}
const updatedUser = {
...user, // continue to send the deviceID!
userID: loggedInID,
email: signUpEmail
};
// Update the user object
await client.updateUserAsync(user);
```
> **Note**: Adding userID after login enables user-level experiments/gates to target and evaluate using userID. *Device-level* experiment evaluations remain based on stableID (or deviceID) and are not changed by adding userID, as long as you continue to pass that identifier as well! This preserves consistency of device-level bucketing.
***