> ## Documentation Index
> Fetch the complete documentation index at: https://statsig-4b2ff144-serverless-cloudflare.mintlify.site/llms.txt
> Use this file to discover all available pages before exploring further.
# Create and Manage Release Pipelines
> Learn how to create, configure, and manage Release Pipelines for controlled feature rollouts
## Creating a New Pipeline
To create a new Release Pipeline:
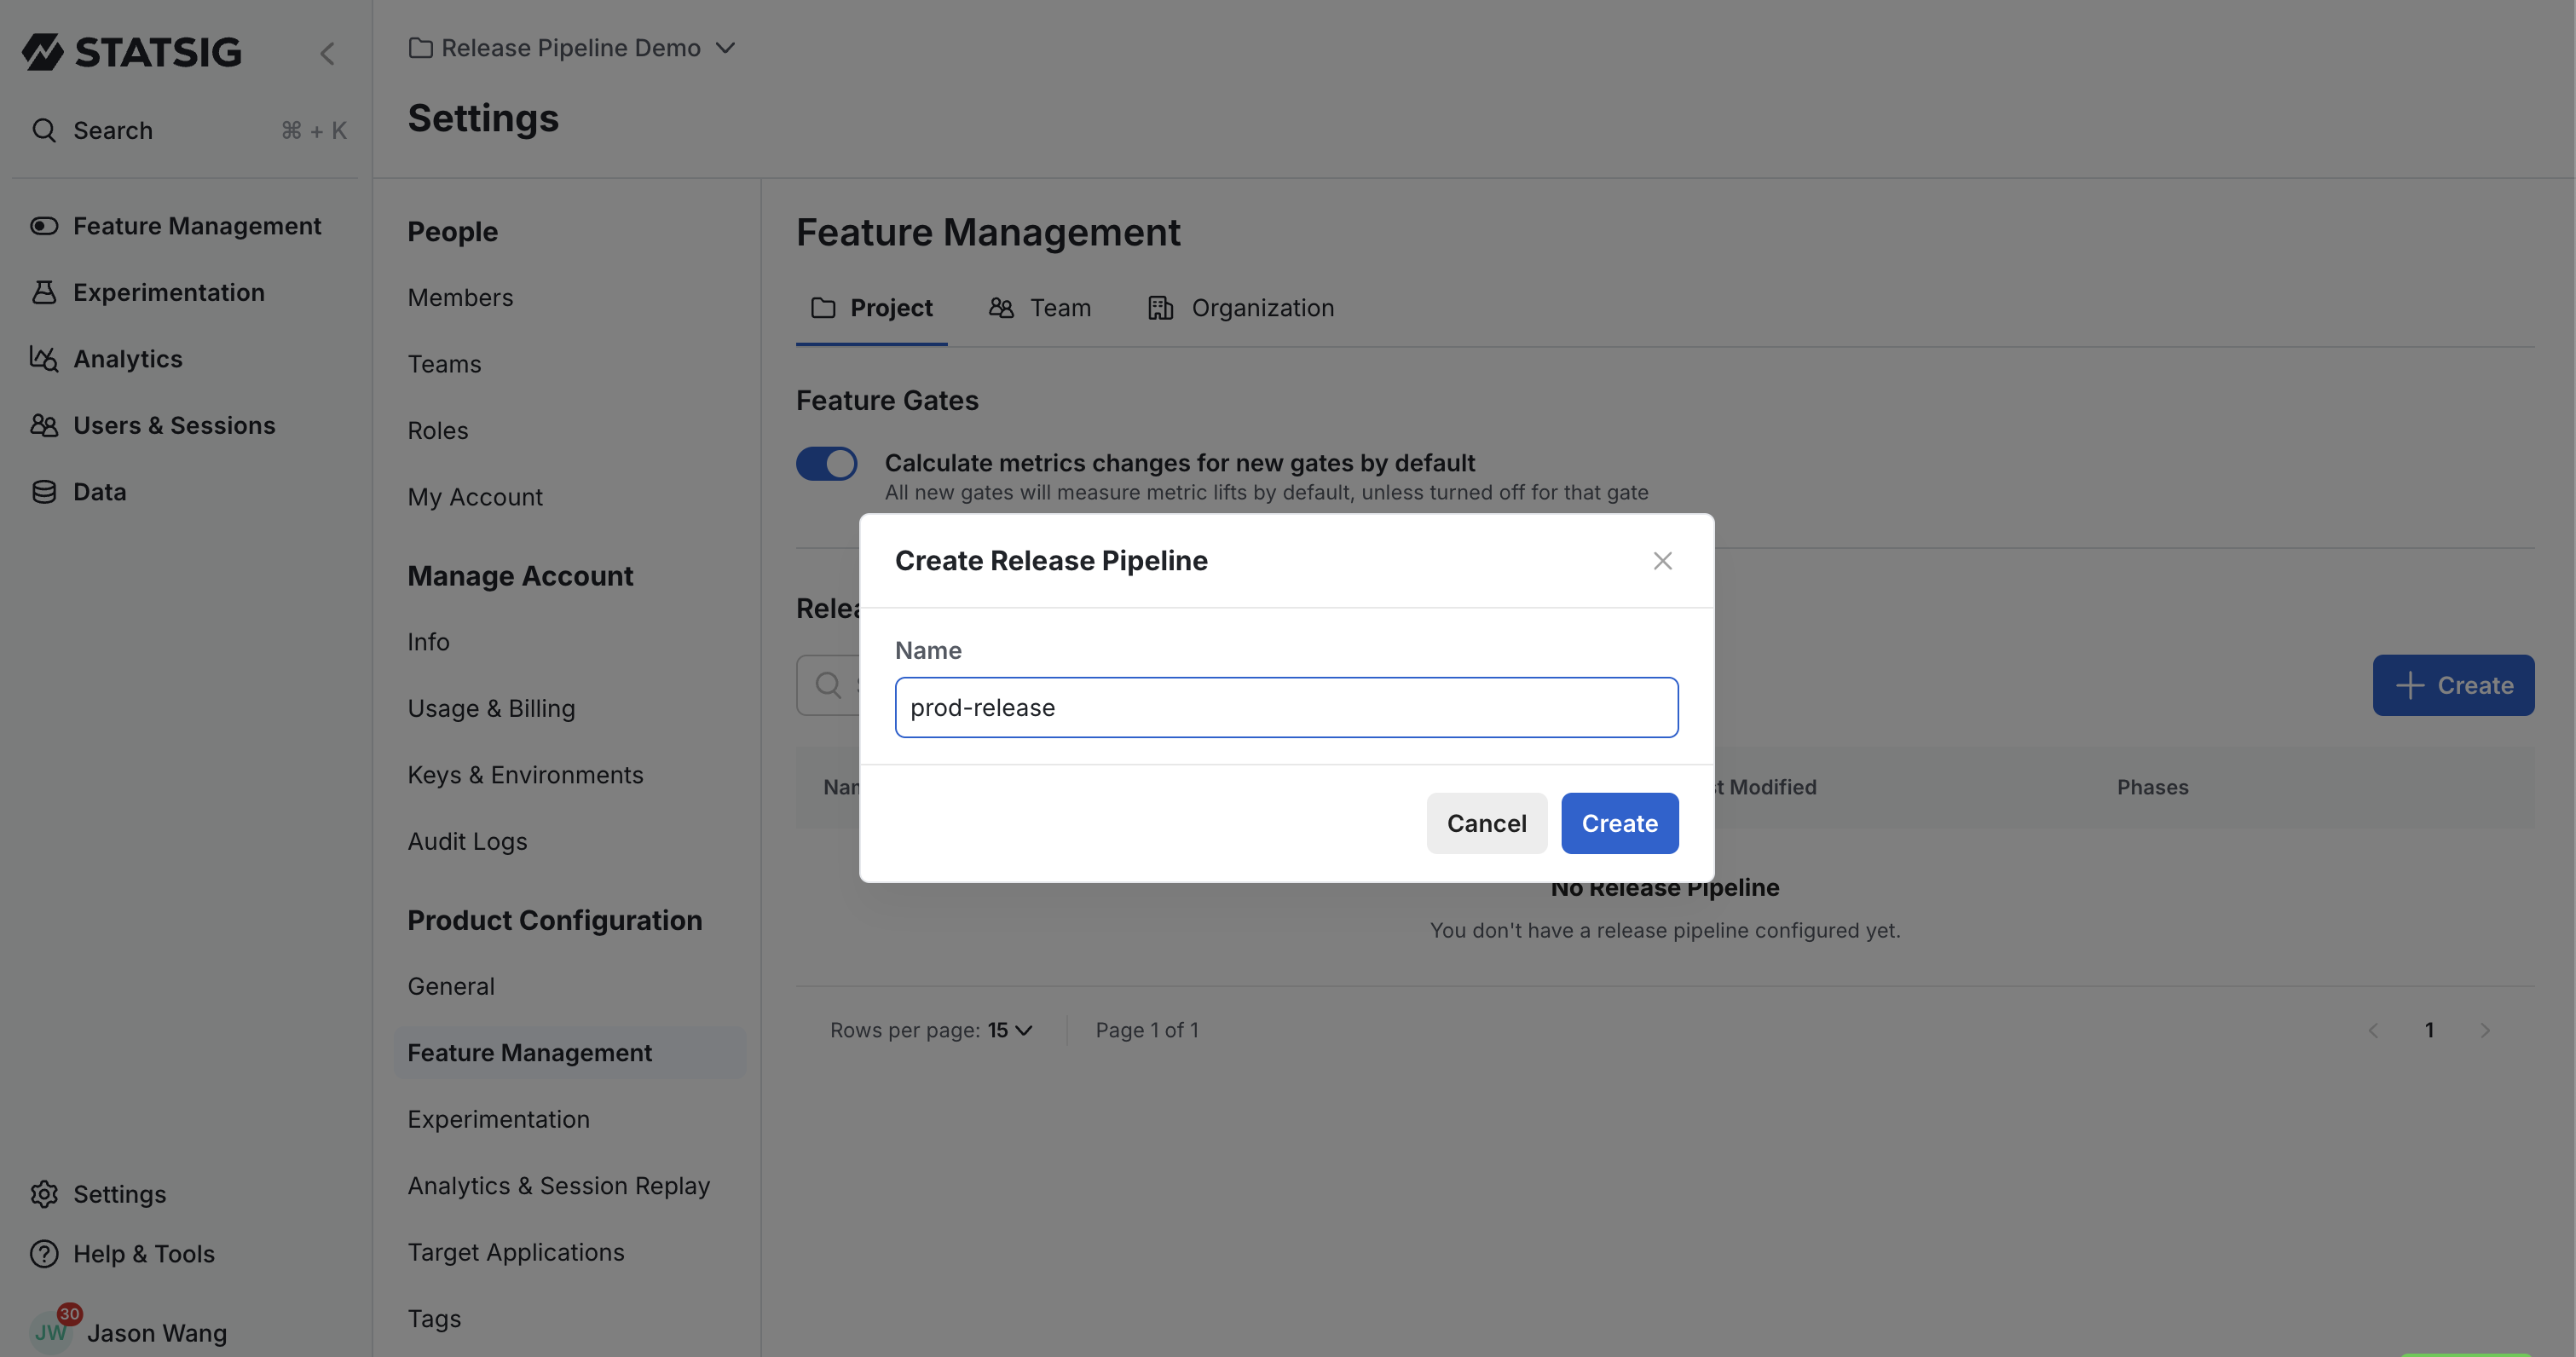
1. Log into the [Statsig console](https://console.statsig.com)
2. Navigate to **Settings** > **Feature Management**
3. Under Release Pipelines, click the **Create** button
4. Enter a descriptive name for your pipeline
5. Click **Create** to proceed to the configuration page
 ## Configuring Phases
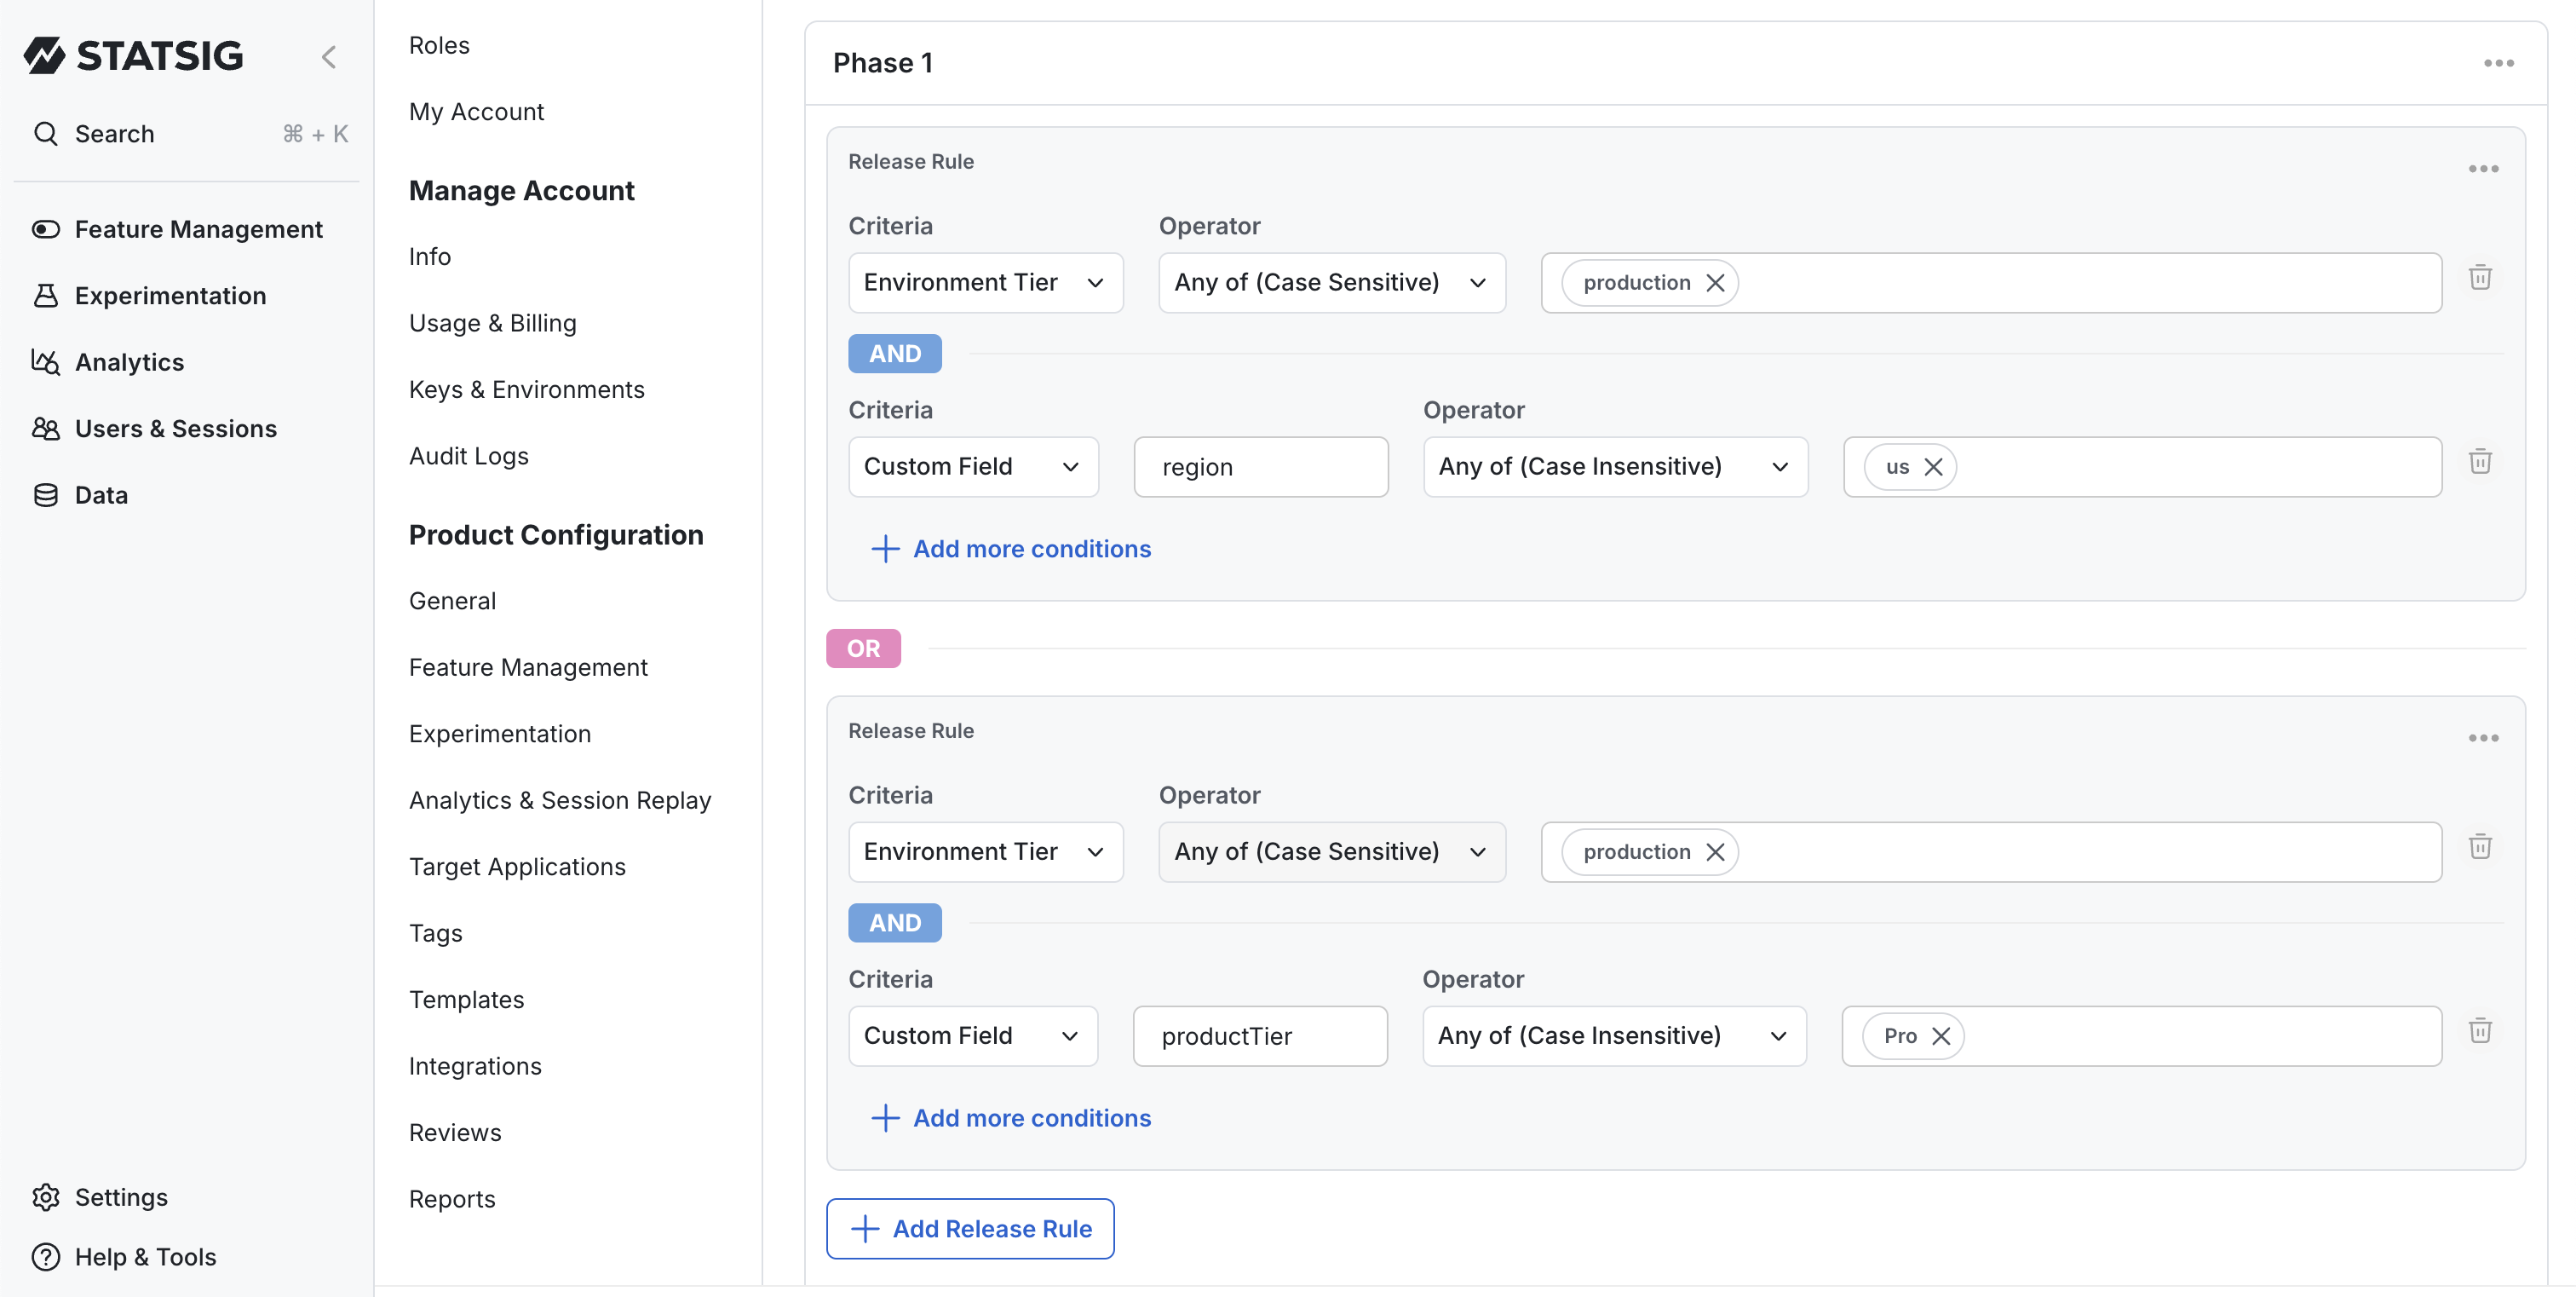
Each pipeline consists of one or more phases, with each phase representing a distinct release target.
### Adding Phases
For each phase in your pipeline:
1. Add one or more release rules
2. Select a required **Environment** for the rule
3. Optionally add custom field conditions for more precise targeting
## Configuring Phases
Each pipeline consists of one or more phases, with each phase representing a distinct release target.
### Adding Phases
For each phase in your pipeline:
1. Add one or more release rules
2. Select a required **Environment** for the rule
3. Optionally add custom field conditions for more precise targeting
 ### Setting Phase Transitions
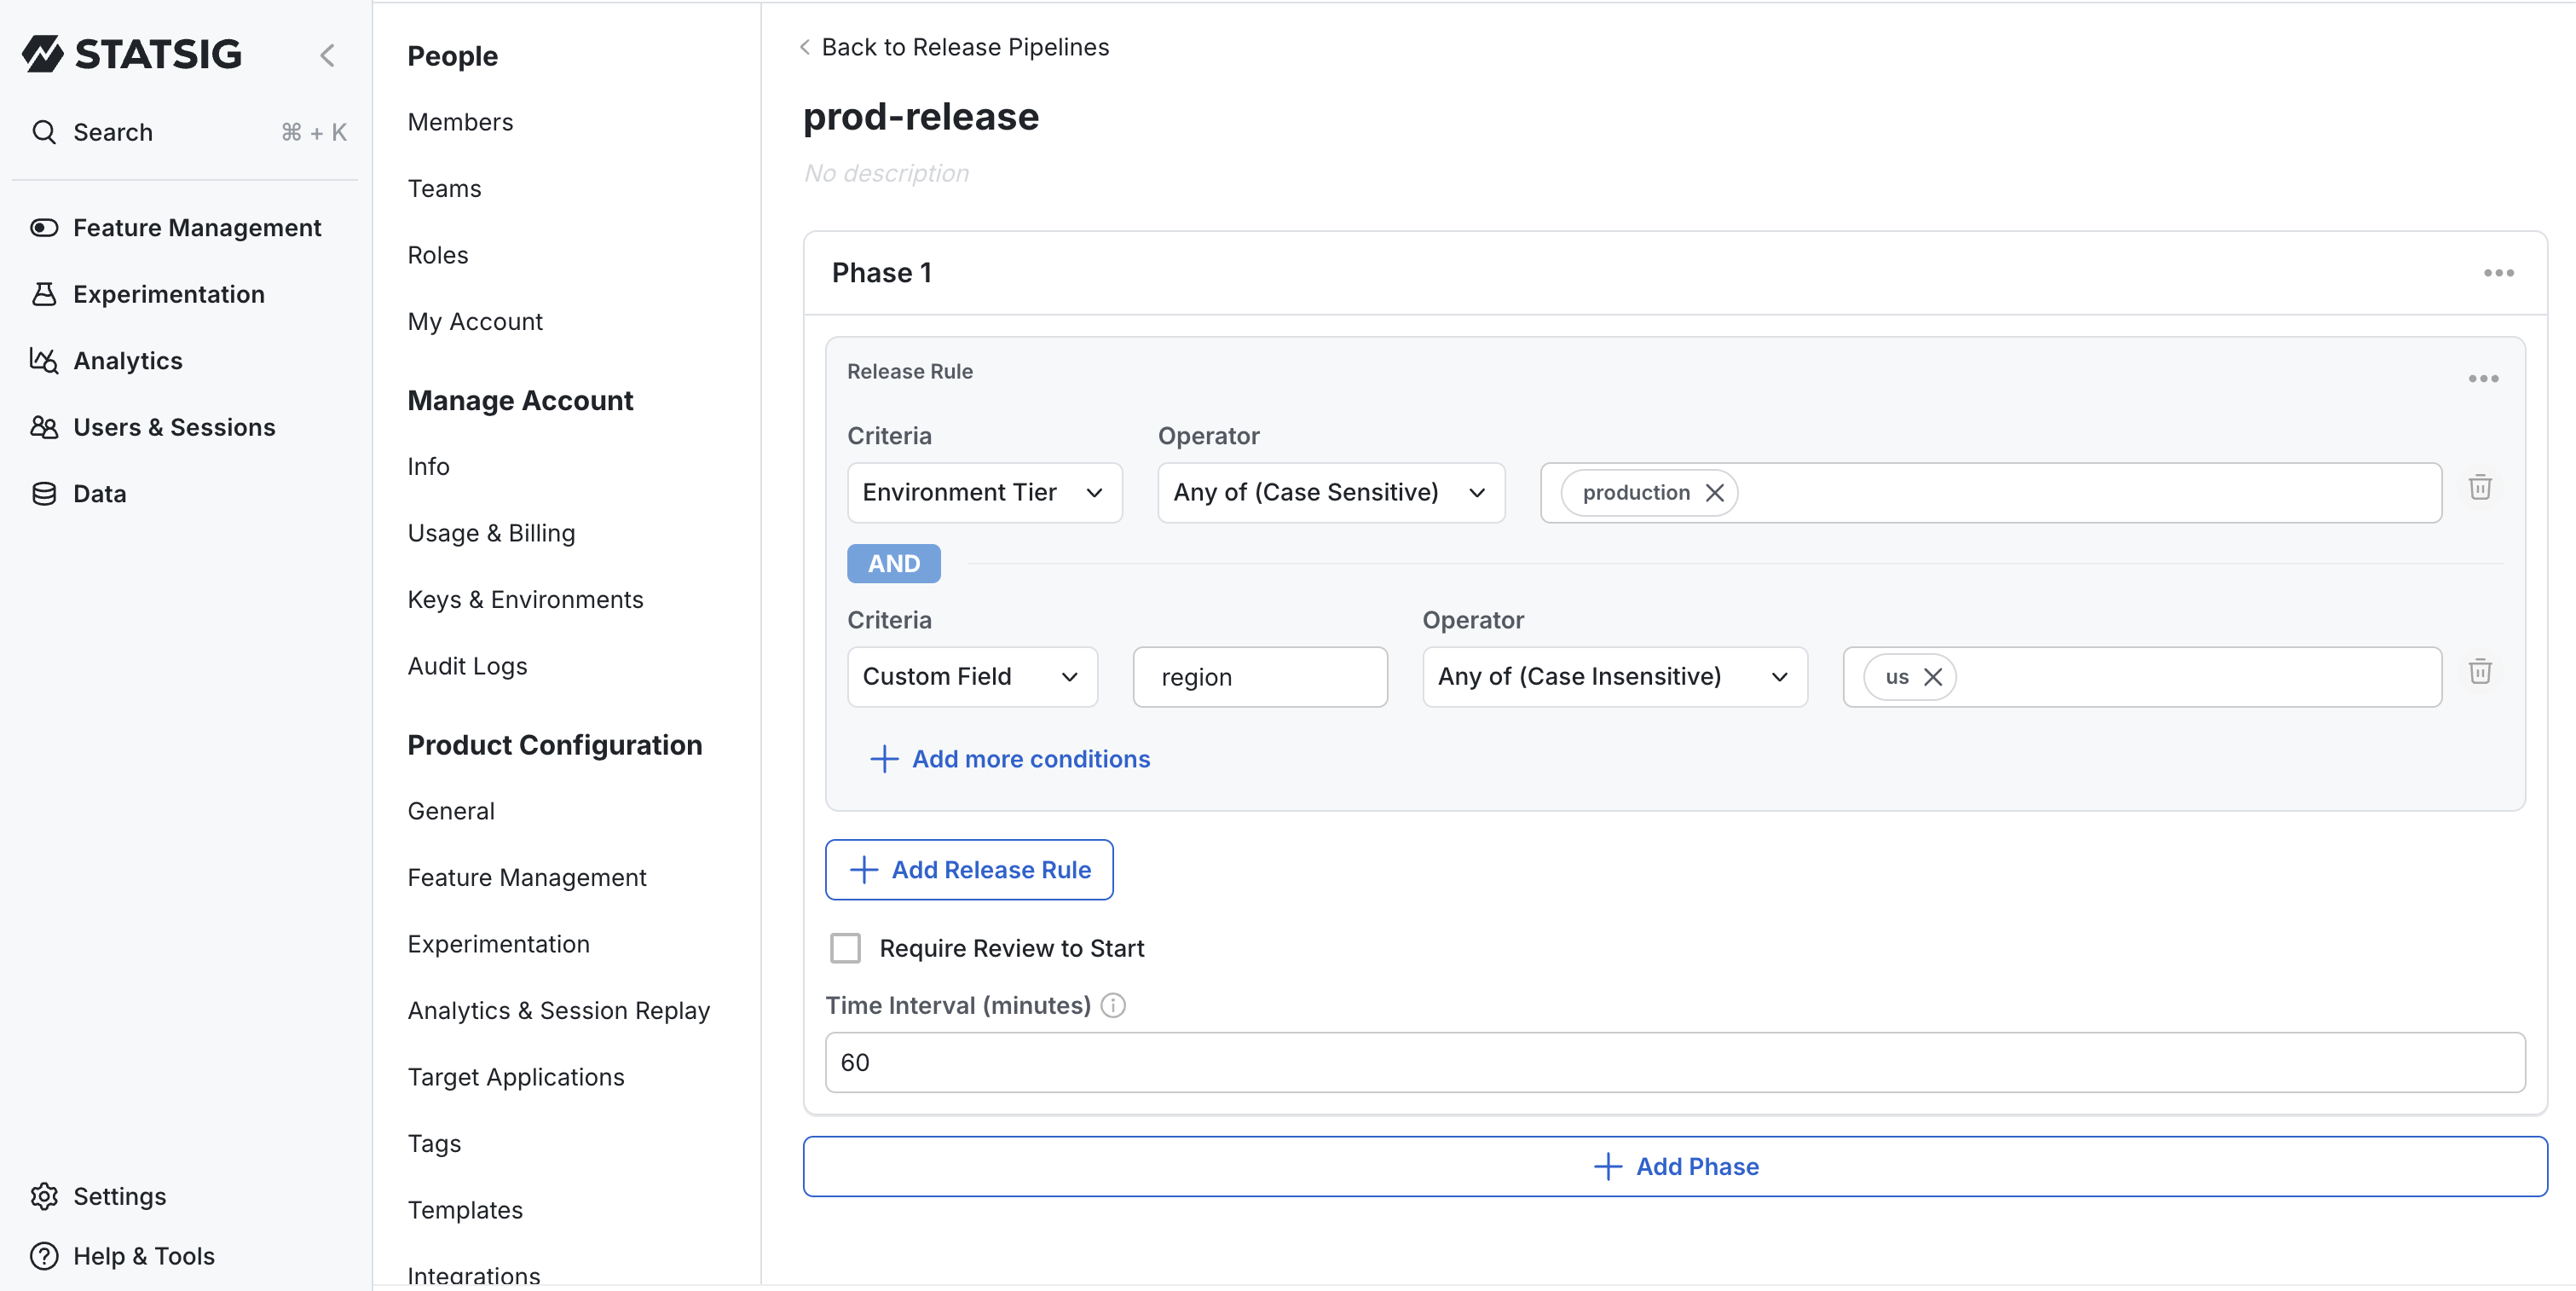
Control how your phases progress with these transition options:
| Transition Type | Description |
| ------------------ | -------------------------------------------------------------------------------- |
| **Require Review** | Requires manual approval from an authorized user before starting the phase |
| **Time Interval** | Automatically proceeds to the next phase after a specified duration (in minutes) |
:::note
You can combine both options in a single phase. When both are used, the time interval will only begin counting down after the required approval is given.
:::
### Setting Phase Transitions
Control how your phases progress with these transition options:
| Transition Type | Description |
| ------------------ | -------------------------------------------------------------------------------- |
| **Require Review** | Requires manual approval from an authorized user before starting the phase |
| **Time Interval** | Automatically proceeds to the next phase after a specified duration (in minutes) |
:::note
You can combine both options in a single phase. When both are used, the time interval will only begin counting down after the required approval is given.
:::
 ## Managing Existing Pipelines
### Updating a Pipeline
To modify an existing pipeline:
1. Click on the pipeline name from the list
2. Make your desired edits to any section
3. Click **Save** to apply your changes
**Important:** Pipelines with active rollouts currently in progress cannot be modified until those rollouts complete or are aborted.
### Viewing Pipeline References
There are two ways to see which feature gates and dynamic configs are currently using a pipeline:
1. Project Settings
* Navigate to Project Settings
* Click on the Feature Management menu in the left-rail
* Navigate to Release Pipelines section
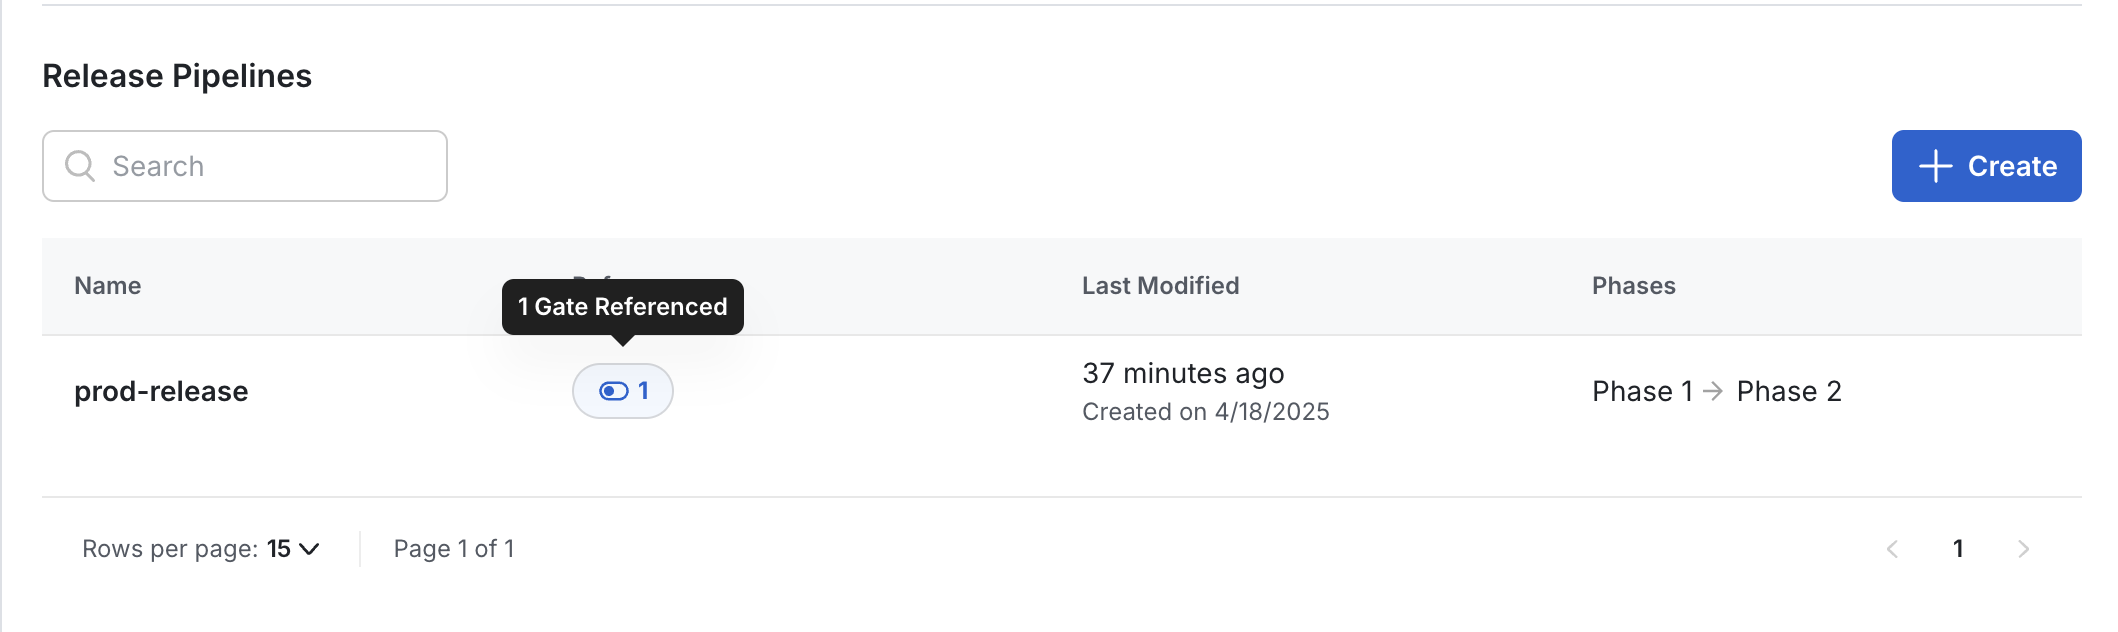
* Click on the **References** column against each Release Pipeline
* This will show all feature gates and dynamic configs that are currently attached to a specific pipeline
## Managing Existing Pipelines
### Updating a Pipeline
To modify an existing pipeline:
1. Click on the pipeline name from the list
2. Make your desired edits to any section
3. Click **Save** to apply your changes
**Important:** Pipelines with active rollouts currently in progress cannot be modified until those rollouts complete or are aborted.
### Viewing Pipeline References
There are two ways to see which feature gates and dynamic configs are currently using a pipeline:
1. Project Settings
* Navigate to Project Settings
* Click on the Feature Management menu in the left-rail
* Navigate to Release Pipelines section
* Click on the **References** column against each Release Pipeline
* This will show all feature gates and dynamic configs that are currently attached to a specific pipeline
 2. Feature Gates / Dynamic Configs Page
* Navigate to Feature Gates / Dynamic Config list view
* Filter by 'Release Pipeline' current status
* This will show all feature gates and dynamic configs with an ongoing release pipeline
2. Feature Gates / Dynamic Configs Page
* Navigate to Feature Gates / Dynamic Config list view
* Filter by 'Release Pipeline' current status
* This will show all feature gates and dynamic configs with an ongoing release pipeline
 ## Opting Out Environments from Release Pipelines
By default, all environments will trigger Release Pipelines when changes are made. However, you can configure specific environments to be exempt from this behavior.
When an environment is opted out from Release Pipelines:
* Changes made exclusively to that environment will not trigger a Release Pipeline
* This allows for quick environment-specific adjustments without initiating the full release process
### How to Opt Out an Environment
To exclude an environment from triggering Release Pipelines:
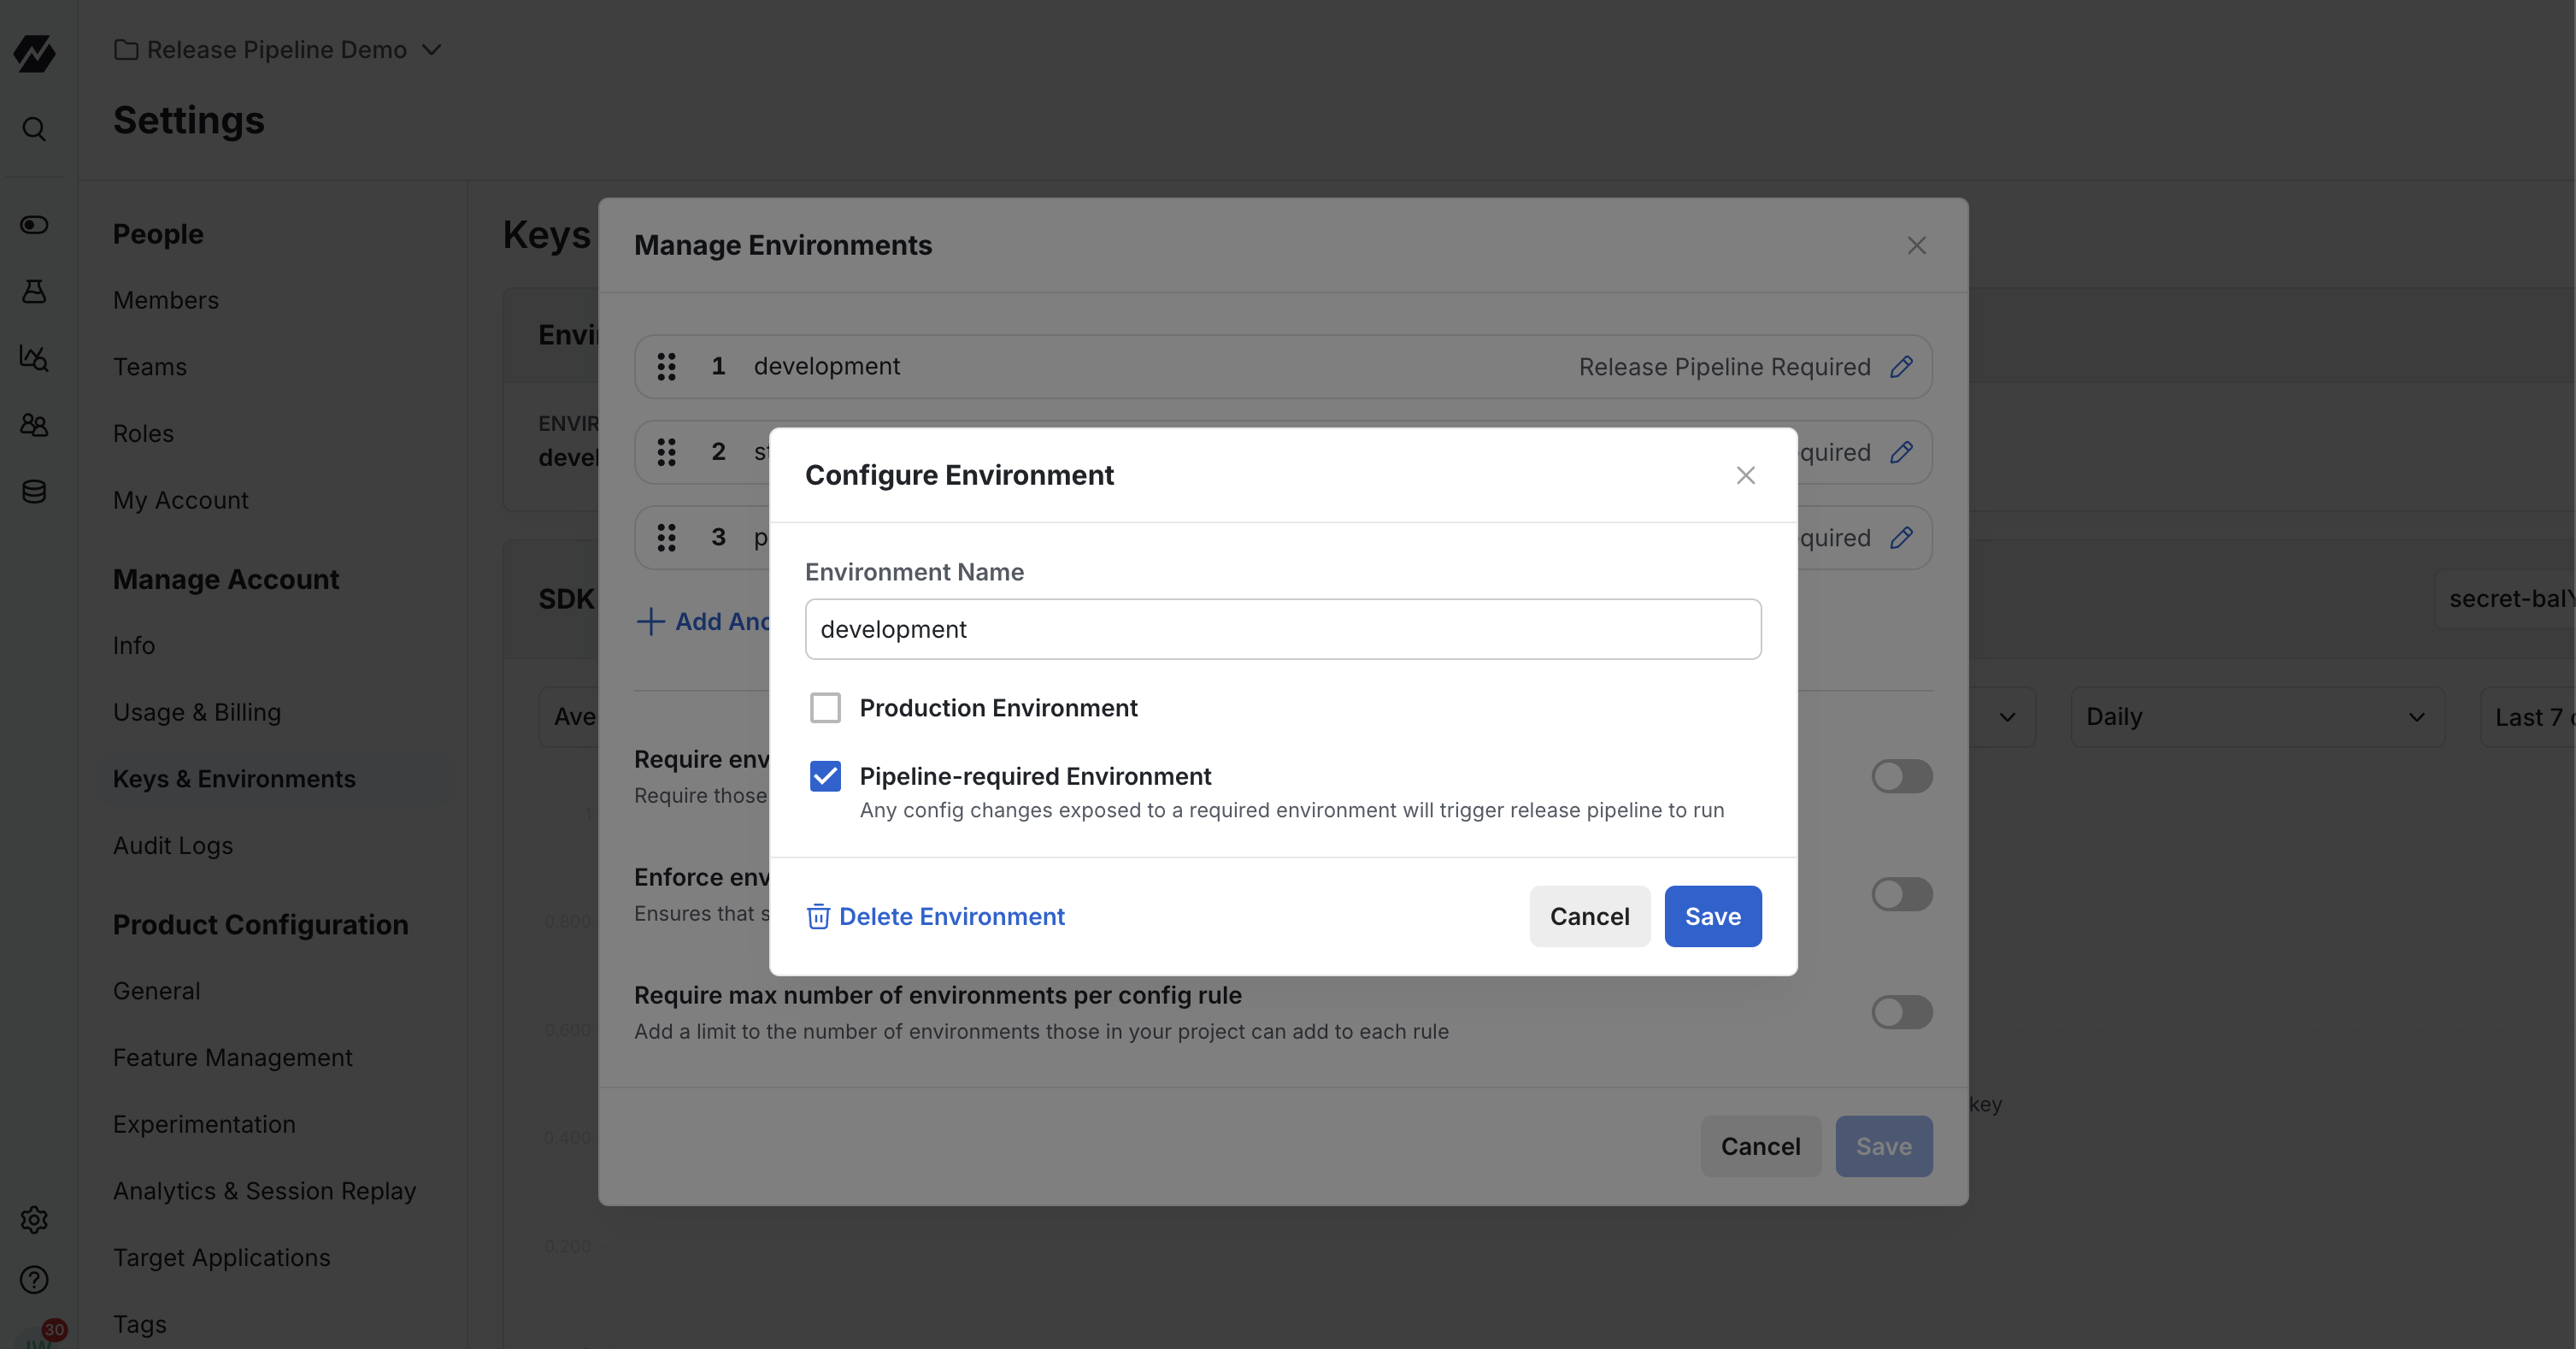
1. Navigate to **Settings** in the Statsig console
2. Under **Keys & Environments**, select **Environments**
3. Click on the environment you wish to opt out
4. Unselect the **Pipeline-required Environment** option
5. Click **Save** to apply your changes
## Opting Out Environments from Release Pipelines
By default, all environments will trigger Release Pipelines when changes are made. However, you can configure specific environments to be exempt from this behavior.
When an environment is opted out from Release Pipelines:
* Changes made exclusively to that environment will not trigger a Release Pipeline
* This allows for quick environment-specific adjustments without initiating the full release process
### How to Opt Out an Environment
To exclude an environment from triggering Release Pipelines:
1. Navigate to **Settings** in the Statsig console
2. Under **Keys & Environments**, select **Environments**
3. Click on the environment you wish to opt out
4. Unselect the **Pipeline-required Environment** option
5. Click **Save** to apply your changes